Text Overlay
Full fps, Live Text Overlay (over video)
Text Overlay is a driver feature which allows you to put text lines onto video frames on-the-fly. Text Overlay works with almost all the video formats supported by the driver (mjpeg, h264, yuv420, bgr24, etc…). Drawing properties of each line such as position, color, font, thickness, scale and also the data itself are read from a JSON file specified via command line when the driver is loaded. If you load the driver with text overlay enabled but don’t specify any file, the driver attempts to open a file from a default path (see the manual for more details). As an interesting note, the default file contains a special tag as metadata which instructs the driver to overlay the live frame rate. The driver will parse the file when the camera is opened the first time or every time an explicit command is given (see below). A failure on validating the JSON file will not be considered a blocking error.
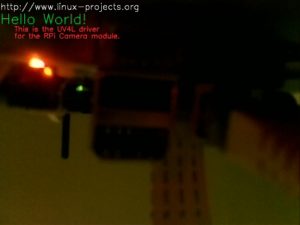
One full example of JSON file with comments can be found here, which results in something like in the image below:
Comments in the JSON file are ignored.
Text overlay can be turned on and off at any time. By sending a standard Video4Linux2 command to the driver (see the example below), it is possible to instantaneously turn on text overlay (if not already on) and make the driver parse the JSON file again for any new text to be overlaied. If you plan to apply changes very frequently during streaming, it is suggested that you place the file in a ramdisk (i.e. under /tmp) for better performance.
It is required to specify the full path to the JSON file when loading the driver. This can be done with the –text-filename command line option. The path cannot be changed later. However, specifying the –text-overlay option makes the driver start with text overlay enabled, but it is not mandatory to do this when loading the driver, you can optionally enable it later.
For example:
raspberrypi ~ $ uv4l --driver raspicam --width 640 --height 480 --auto-video_nr --encoding h264 --text-overlay --text-filename=/tmp/text.json
To turn text overlay off, type:
raspberrypi ~ $ v4l2-ctl --set-ctrl=text_overlay=0
To turn text overlay on at any time:
raspberrypi ~ $ v4l2-ctl --set-ctrl=text_overlay=1
v4l2-ctl is a standard linux tool. As mentioned, the above command will also make the driver parse the JSON file and immediately draw all the text lines described there onto the video stream.
NOTE 1: if you want to turn on text-overlay while the camera is in use by another application AND text-overlay was turned off when that application opened the Camera, you need to close that application first.
NOTE 2: when text-overlay is enabled, image width should be multiple of 16.
To show what fancy things you can do with the Text Overlay feature, below we will see how to add a simple text animation to your video stream with the help of a very simple program called uv4l-overlay. The source code can be found here, while the binary can be found here. Run it as in the following example:
raspberrypi ~ $ ./uv4l-overlay /dev/video0 /tmp/text.json "Hello World, this is a simple text animation"
It’s not necessary to run uv4l-overlay after you have started the capture with some application. Also, note that in this case the /tmp/text.json argument is exactly the path to the file (in memory) at which the driver is currently pointing.
The resulting effect is something like this!
If you notice glitches in the moving text, that’s because the simple micro sleep’s in the loop in the example program are not always accurate. Feel free to fix this flaw. In short, modify the few lines of source code above so that the effect can best fit your needs, recompile and… have fun!
留言
張貼留言