How to Configure SSH Port Forwarding and Set Up Load Testing on Google Compute Engine
Author(s): @deb-saunders Published: May 8, 2017
Google Compute Engine provides virtual machines on demand. With Compute Engine you can do large scale computational work and achieve high performance. It is useful to be able to communicate bidirectionally between virtual machines on Compute Engine and remote machines, such as a local personal computer.
This document uses JMeter as an example of this scenario and explains how to configure SSH port forwarding to enable the bidirectional connections. With this technique, you can set up a JMeter server cluster on Compute Engine for load testing and control the cluster from a JMeter client, running on your local personal computer.
JMeter is an open-source load testing framework from the Apache project. Whenever you develop a server or deploy a system, load testing is a critical step that needs to be taken before a system goes live. Load testing is important for several reasons:
- Verifies that your system serves the expected number of users/requests.
- Allows you to monitor the server’s behavior and responsiveness under high stress conditions.
- Exposes potential bottlenecks in your system.
This document presents an efficient way of setting up a distributed load test environment with JMeter on Compute Engine instances.
Assumptions
This document provides a detailed description of how you can set up a JMeter load test environment to run load tests on Compute Engine. It assumes you have a technical understanding of networks and requires some familiarity with Compute Engine and its gcloud command line tool.
Although this document describes how you can set up a JMeter test environment, it doesn’t go into any detail about JMeter itself. Building a test plan and executing tests on JMeter are outside the scope of this document.
Contents
- Load Test and JMeter Basics
- JMeter Server Configuration on Google Compute Engine
- Scaling for Multiple Remote Servers
- Additional Resources
Load Test and JMeter Basics
The following section introduces the basics of load testing and JMeter, and the next section dives into some specifics of using JMeter with Compute Engine.
Load Testing Basics
A common feature of load testing software is the ability to automatically generate loads against the server. The load test system can simulate a large number of simultaneous user requests. It can also record responses from the servers and gather statistical information about them.
The challenge of load testing is creating a large enough number of requests to stress the tested server. In many cases, load tests running on one computer alone cannot generate enough load, so multiple computers need to be orchestrated to increase the load to the server.
This tutorial shows you how to set up a JMeter server cluster on Compute Engine instances. By setting up the JMeter server cluster on virtual machines provided by Compute Engine, you are freed from the maintenance of physical servers, and it provides flexibility of the number of instances you start for your load testing. JMeter is a generic framework, and the target system of the load test can reside anywhere the JMeter cluster can access. It can be a Google App Engine application or any system that resides on Compute Engine, on-premises servers, or another cloud platform.
The actual performance can be affected by many factors, including network performance. To accurately measure performance, an isolated system is required. As a result, this system is not regarded as performance test environment.
JMeter
JMeter runs on Windows, Mac, and Linux. It supports various protocols for testing and provides a visual UI (User Interface) for configuring the load tests. See Figure 1 for a screenshot of the JMeter UI:
Figure 1. Screenshot of the JMeter UI 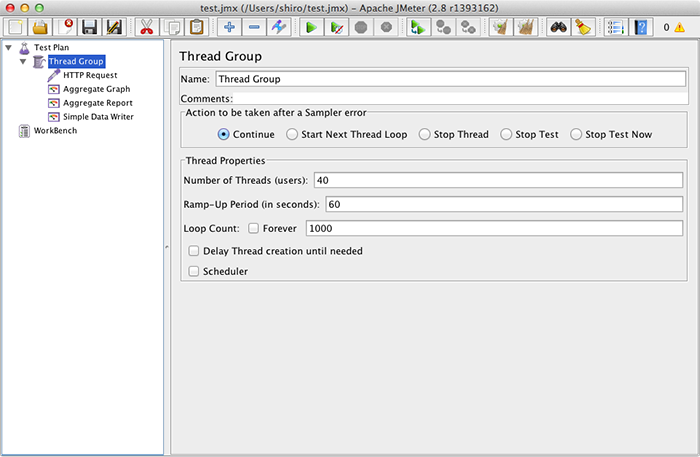
JMeter supports distributed tests where the load test system consists of the following:
- JMeter servers that send requests to the tested server
- A JMeter client that controls load level and aggregates test results from the JMeter servers
The JMeter client is the workstation running the JMeter UI. The JMeter servers can sit elsewhere on remote servers (Fig. 2). You can mix server types in the configuration. For example, your Mac can be set up as the JMeter client and Linux servers as JMeter servers.
Although JMeter simulates HTTP requests, where each JMeter server thread acts as an HTTP client, JMeter neither renders the page nor runs JavaScript. Therefore, embedded files, such as images or data downloaded by AJAX, are not automatically downloaded.
To simulate an actual load situation, the test scenario must be carefully built in such a way that the system can mimic the behavior of actual users as closely as possible.
Figure 2. Using JMeter for load testing 
To use a JMeter distributed setup, first list all the JMeter servers in the configuration file of your JMeter client remote_hosts entry in bin/jmeter.properties. To start the tests, use remote start all instead of start. When you use the remote start all command, the JMeter client connects to all the remote JMeter servers listed, starts running tests, and receives all the results.
During the load test, results from all servers in the JMeter cluster are sent to the client. Results are consolidated and shown on the JMeter client screen (Fig. 3).
Figure 3. Screenshot of consolidated load testing results on the JMeter Client 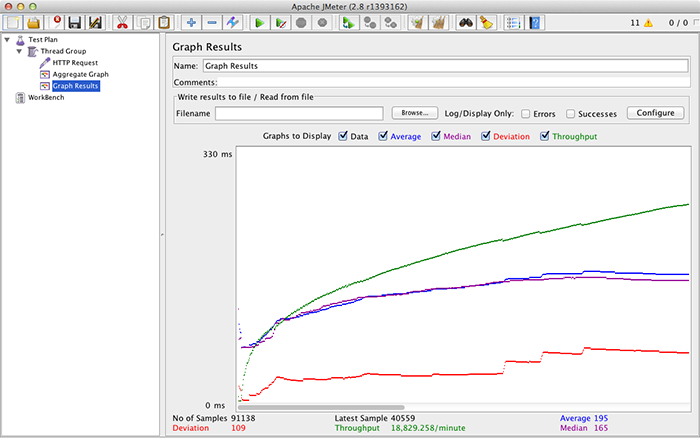
JMeter is equipped with other kinds of result handlers in addition to the one shown.
JMeter Server Configuration on Google Compute Engine
The rest of this tutorial discusses how to configure JMeter Servers on Compute Engine. This tutorial assumes you will set up multiple JMeter servers on Compute Engine Linux instances and run the JMeter client on a Mac.
Connections between JMeter Client and JMeter Servers
When the JMeter client remotely starts the test, communication between the JMeter client and the JMeter server is established via the JMeter connection and Java Remote Method Invocation (RMI). The JMeter connection is always initiated by the JMeter client. The TCP connection for RMI, on the other hand, is started in both directions. This results in the creation of a total of three connections (Fig. 4).
Figure 4. Connections between the JMeter Client and the JMeter Server 
It can be challenging to configure the connections when the JMeter client is running behind a firewall using 1:N NAT (Network Address Translation) and is connected to JMeter servers on Compute Engine, which are also behind a firewall.
Compute Engine uses 1:1 NAT for its external IP address. Each Compute Engine instance uses its internal private IP address as its IP address. This prevents the JMeter remote server from being able to connect to the JMeter client because the client is behind a firewall and has no public address. The client, on the other hand, cannot connect to the remote server because the server reports its internal private IP address as its public address (Fig. 5).
Figure 5. Firewalls pose a communication challenge between the JMeter Client and JMeter Servers 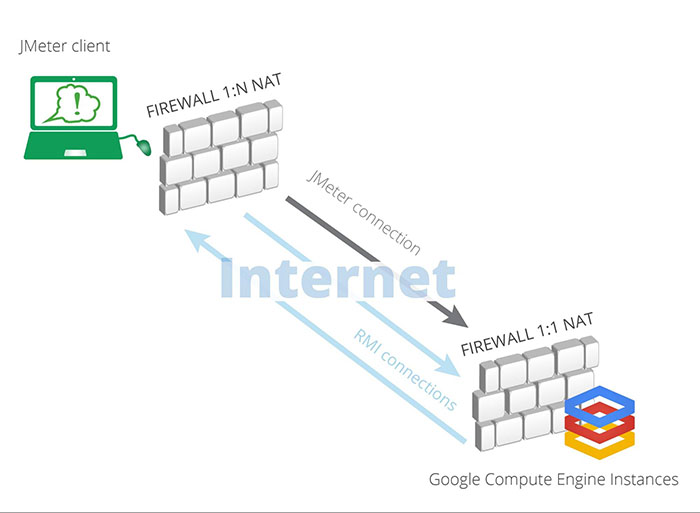
SSH Port Forwarding Technique
Secure Shell (SSH) has a functionality called SSH port forwarding (or SSH tunneling), where a connection is forwarded to a different port where the actual communication is made on the SSH connection. The port forwarding can be done either on the SSH client or the SSH server side. With port forwarding, you can set up ports that allow the JMeter client and server to connect to each other.
Figure 6. Forwarding connections to a different port 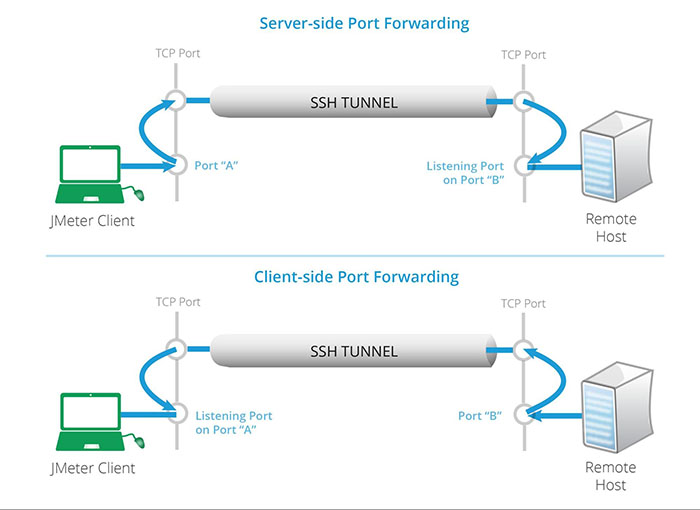
Note that “A” and “B” in Figure 6 refer to port numbers.
To set up server side SSH port forwarding as shown in the examples above, you would execute the following command on your client machine (-L indicates local and -R indicates remote).
ssh -L A:127.0.0.1:B @
Similarly, the following command sets up the client side port forwarding.
ssh -R B:127.0.0.1:A @
On Windows, you can configure SSH port forwarding by using PuTTY from “Connection” - “SSH” - “Tunnels” of PuTTY configuration in a similar manner.
SSH Port Forwarding Configuration for JMeter
JMeter uses three connections: one from the client to the server using JMeter Connection, and two additional connections, one for each direction between the client and the server for RMI. You need, then, to configure three port forwardings to cover all connections. For the sake of the example, use the following port numbers as shown in Figure 7:
- Port 24000 for the JMeter connection
- Port 25000 for RMI from server to client
- Port 26000 for RMI from client to server
Figure 7. An example of a port forwarding configuration for three connections 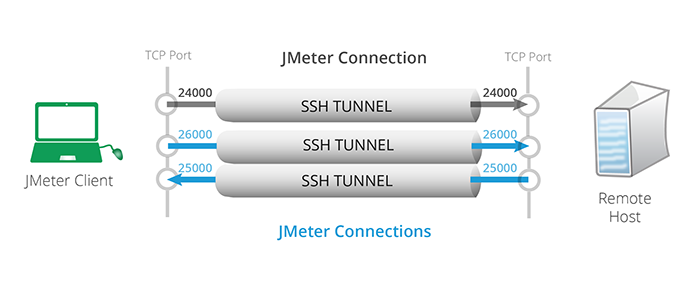
The example command below sets up forwarding for 3 ports. You might want to add the -N option to only forward ports and the -f option to run ssh in the background.
ssh -L 24000:127.0.0.1:24000   \
-R 25000:127.0.0.1:25000   \
-L 26000:127.0.0.1:26000 -N -f @
To use the proper port numbers, all that is left to do is to configure the JMeter client and server.
1. Configure the Client
To configure the JMeter client, change the following items in bin/jmeter.properties:
remote_hosts=127.0.0.1:24000
client.rmi.localport=25000
mode=Statistical
Here are some configuration details:
- remote_hosts tells the JMeter client which JMeter server to use
- client.rmi.localport specifies the JMeter connection port number for the client
- mode indicates how the results are sent back from the server to the client
The previous section discussed port forwarding for the JMeter connection. Here, specify port 24000 of the localhost (127.0.0.1) as a remote host and specify the client RMI listening port to 25000 because that’s the port number that the RMI connection from JMeter server is forwarded to.
Because you will send massive amounts of requests from the JMeter servers to the target system, you don’t want to send back an equal number of results to the JMeter client. So, you will need to set data transfer to a “Statistical” mode. The statistical mode specifies that statistical information is sent from the JMeter server, resulting in a reduction of transfers between the JMeter server and client. Otherwise, the JMeter client would be the bottleneck of the load test. For more details about the configuration, see the JMeter document.
2. Configure the Server
To configure the remote JMeter server, you also need to edit bin/jmeter.property as follows:
server_port=24000
server.rmi.localhostname=127.0.0.1
server.rmi.localport=26000
These settings tell the JMeter server to bind to port 24000 for the JMeter connection and port 26000 for server-side RMI listening.
Start the Remote Server
Finally, when starting the JMeter server on a remote Linux box, you will need to tell JMeter to use localhost (127.0.0.1) as its RMI server.
bin/jmeter-server -Djava.rmi.server.hostname=127.0.0.1
This command starts the JMeter server on the Linux box and accepts a connection from JMeter client. Then, you can start JMeter client again, specifying localhost as the RMI server.
bin/jmeter.sh -Djava.rmi.server.hostname=127.0.0.1
Note that on Windows you will need to use bin/jmeter.bat.
You can create test cases using the JMeter UI, as usual. The JMeter client automatically recognizes the remote JMeter server, issues the remote start all command to initiate a connection with the JMeter server, and starts sending requests from the remote JMeter server to the target system being tested.
Setting up JMeter Servers on Google Compute Engine
Because a Compute Engine instance works as a regular Linux box, no special configuration is required. However, the easiest way to ssh into it is to use the gcloud compute ssh command rather than the vanilla ssh command, because
gcloud compute ssh pre-sets some options for connecting to Compute Engine.
With the
gcloud compute ssh command you need to specify the -- option to pass parameters to ssh.
To set up the SSH port forwarding for Compute Engine, use the following command:
gcloud compute ssh  --zone  -- -L 24000:127.0.0.1:24000  \
-R 25000:127.0.0.1:25000 \
-L 26000:127.0.0.1:26000  -N -f
Note that an
-L or -R argument must be combined with the parameter that follows it, so they are passed as a single parameter to ssh. Otherwise, the parameter is interpreted as a parameter for gcloud.Configuring Multiple JMeter Servers
So far, you have seen an example of how to successfully set up the JMeter server on the Compute Engine instance. However, the main objective of using remote JMeter servers is to enable a single JMeter client to orchestrate multiple JMeter servers to stress the tested server in such a way that would otherwise be impossible to achieve with a single computer.
If the JMeter client and JMeter servers are on the same side of a firewall (for example, they’re both on-premises at a company), all the JMeter servers can use the same port. However, this example enabled SSH port forwarding, so each server needs to be configured to use a different forwarding port and corresponding RMI listening local port.
All servers can still use the same number for the RMI port to connect to the client, like 25000, as was the case in our example.
Suppose the second JMeter server uses 24001 and 26001 for the JMeter connection and the RMI from client to server respectively. In this case, the SSH port forward setup command for the second server should be:
gcloud compute ssh  --zone  -- -L 24001:127.0.0.1:24001  \
-R 25000:127.0.0.1:25000  \
-L 26001:127.0.0.1:26001 -N -f
The second server should have the following JMeter configuration:
server_port=24001
server.rmi.localhostname=127.0.0.1
server.rmi.localport=26001
And, finally, the configuration for the JMeter client with two servers would be as follows:
remote_hosts=127.0.0.1:24000,127.0.0.1:24001
client.rmi.localport=25000
mode=Statistical
Note that the example presented in this tutorial specified port numbers of 24000, 25000, and 26000, where the maximum number of servers is 1000 to avoid an overlap of port numbers. If your cluster has more than 1000 servers, you would need to use a different set of port numbers with a larger gap between them.
Scaling for Multiple Remote Servers
Up to this point, you have learned how to configure JMeter to use Google Compute Engine instances as JMeter servers. However, setting up more than a few instances manually is not an ideal situation. Because Compute Engine allows access via API, and each Compute Engine instance can be configured by startup scripts, you can create an automated script to accomplish the following:
- Start Compute Engine instances
- Configure them as a JMeter server cluster
- Activate SSH port forwarding from the local computer
- Start the JMeter client
- Tear down the JMeter server cluster when it’s no longer needed.
Design of the Automated Script
Here is an introduction to the sample implementation of such a script, jmeter_cluster.py. The sample application is available on GitHub.
jmeter_cluster.py uses:
- Google APIs Client Library for Python to control Compute Engine instances
- gcloud command line tool to set up SSH port forwarding
- Google Cloud Storage to store the Compute Engine instance’s startup script and JMeter server package
The JMeter server package includes pre-configured jmeter.properties in the “bin” subdirectory. However, port numbers must be customized per instance. The startup script will overwrite the port numbers for you.
Here’s of an overview of what the script does:
- Starts up the cluster
- Starts Compute Engine instances.
- Startup script downloads JMeter server package from Cloud Storage.
- Startup script modifies port numbers in JMeter configuration based on its server ID number in the cluster (0, 1, 2, …). The server ID is passed to each instance as custom metadata of Compute Engine instance.
- Startup script starts JMeter server process.
- Sets SSH port forwarding
- Runs
gcloud compute sshcommands to setup SSH port forwarding. - Updates server list as a remote_host JMeter configuration.
- Runs
- Starts JMeter client
- Starts JMeter client on local machine from JMeter client package.
- Tears down the cluster
- Deletes JMeter server instances.
Usage
Start a cluster and set SSH port forwarding
./jmeter_cluster.py start [cluster size] [--project ] [--prefix ] [--image ] [--zone ] [--machinetype ]- Starts up a cluster that consists of [cluster size] number of Compute Engine instances.
- Also sets SSH port forwarding.
After running the start command to start the JMeter server, run the client command to start the JMeter client.
Set SSH port forwarding if the terminal is interrupted
./jmeter_cluster.py portforward [cluster size] [--project ] [--prefix ]- Sets SSH port forwarding for [cluster size] number of instances.
- This is required only when the terminal that started the cluster loses connection to the instances which, in turn, cancels SSH port forwarding.
After running the portforward command to re-establish port forwarding, run the client command to restart the JMeter client.
Start the JMeter Client
./jmeter_cluster.py client [additional parameters to JMeter]- Starts JMeter client on the local machine.
Shutdown the JMeter System
./jmeter_cluster.py shutdown [--project ] [--prefix ]- Tears down the JMeter server cluster.
Get help using the script
./jmeter_cluster.py -h- Shows command usage.
/jmeter_cluster [start|shutdown|portforward|client] -h- Shows usage of subcommand.
留言
張貼留言